Monday, December 31, 2012

Out of Touch


Hi.  I have been out of touch for a few months.  Very busy with Christmas card orders, training for and completing a half marathon, cruising, being sick, etc.  Then, I had a problem getting onto my blog to ad a new post.  I finally got it figured out, so here I am again with some of my favorite Christmas and Chanukah card from 2012.  I hope you enjoy them.


This door was a digi stamp that I colored with Copic markers.  I made the wreath with a circle punch and cut out the center.  The berries are mad with red stickles.

I just realized that most of the posted cards were done with digi stamps.  I made a bunch from rubber, but these are the ones that I like the most.  


This one has gotten the most response.  It is actually an image from another card that I got last year that was on acetate.  I Decided to repurpose it.  I got a lot of buzz on this one!


I thought this one was really cute and just had to use it!


This is a beautiful digi and it was a lot of fun coloring it.


I used colored pencils on this card.  I did the words on the computer.  I just felt that it was singing to me and I used a music embossing background.  I like the way the lace on the card brings out the lace on her skirt.


I just realized that this was an actual stamp.  That is how I was able to heat emboss  the Menorah in gold.


I really love this dove Menorah.  Isn't it cute?  The lace on the background is actually stamped and heat embossed with white embossing powder.  Looks like real lace doesn't it?


Until next time…I hope everyone has a happy and healthy new year!

Saturday, September 8, 2012

Binker Birthday


                          Front                                                                            Inside


The first thing I did was color the image with Copic markers.  I added Glossy Accents to each individual balloon and his shoes, etc. for added dimension.  I sponged the background.  The front of the card was embossed with a Cuttlebug folder.  I used Nesties to cut the hole and make a tiny frame around it.  I used my Cricut to cut out happy birthday and added 4 dots of Viva Decor yellow pearl to the corners.  Then I glued the image inside so the balloons would show through the round frame.  The image is from Guylou's Inimitability.  www.guylousinimitability.com

Saturday, September 1, 2012

CWLC 7 Delicious Doodles


I colored the image with colored pencils and added red Stickles for the holly berries.  I also added 3 red rhinestones on the right top corner to balance out the image since the image just stopped on the left side and I had to cut it on the edge.  I used 2 different die cuts and added the red and black ribbon.  I mounted it on red card stock that was embossed with a Stampin'Up poinsettia folder.  I punched the holly corner and added a piece of green paper underneath the match the green die cut.  I also added more red Stickles to make the holly berries.  I rounded the corners and mounted it on white card stock. 

CWLC 6 Card Sketch


The inspiration for this card was a card sketch from CWLC.

I made this card using a new technique that I learned on Thursday in my stamping club.  I stamped the image with Stazon ink, onto light green tissue paper.  After the ink dried, I crumbled it up.  After I straightened the tissue, I brushed a plain piece of CS with Glossy Accents and added another layer of Glossy Accents to the top, lightly pressing down on the tissue paper.  I cut out the image with a Nestie and cut another piece, the same size and cut it in half to make a shadow effect.  I pop dotted it onto a background that I had made a while back, with plastic wrap and ink.  I glued the flowers onto the buttons and glued them on 3 corners.  I stamped the sentiment on the other corner.  I think this is one of the fastest cards I ever made!


Wednesday, August 29, 2012

CWLC 5 Furry Friends


This is the card I made for the DT for Created with Love Challenges.  The image is from an unknown source.  I colored the image with Copics and cut it out and embossed with a large rectangle Nestie.  I cut out around the tails and placed a brown wood DP behind the back of the image so it looks like the cats are sitting on a fence.  I double embossed the red background and added a 1/16" frame in white and mounted the whole thing on a dark green card base.  I added a strip of DP to bring out the blue of the sky.  I also added white Stickles to the bottom of the hat and the pompom.  The inside says "Meowy Christmas" and has a Santa hat hanging on the M.

Sunday, August 26, 2012

DT Card and Another Holiday One

Hello everyone.  Sorry that I have been late in posting.  I have had company all last week and will continue for all of next week.  We have been very busy!


                   Front


               Inside


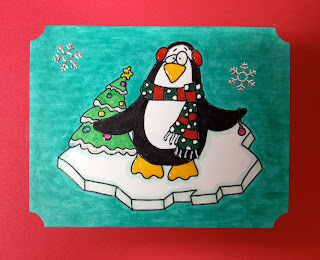
The first card is a holiday card that I just made.  I used a digital stamp of unknown origin.  I colored him with Copics and added Glossy Accents to his beak and feet.  The hole in the front of the card, as well as the scalloped frame were cut out with Nesties.  I used embossing ink and stamped snowflakes on the front of the card and added silver Season's Greetings and snowflake stickers to the front and inside of the card.


                   Outside                                                             Inside


This card is one that I made for the Created With Love Challenges Design Team.  The subject was to be a sympathy card with a Bible verse.  I got confused and forgot to put in the Bible verse.  Anyway, you get the idea.  I stamped the praying hands, colored with Copics and cut them out.  I attached tinted vellum with eyelets and stamped the verse with black Stazon ink.  Put a ribbon and double bow over   designer paper background.  The inside is a digi verse and I made the cross with small strips of blue paper to match the inside frame.  

and see what others have done with this challenge.


Till next time...

Friday, August 17, 2012

Design Team Inspirations


             The CWLC DT challenge this week was to use any image from Delicious  Doodles and make into a card that has 3 elements that are the same.  Here is what I did...First, I decided to really challenge myself and choose an image that I would not have normally chosen.  I printed the image twice.  Then, I colored the entire image with Copics.  Then I colored the three butterflies on the second image and cut them out.  (Not an easy task!)  I pop dotted the three butterflies on top of the full image.  I used a lot of glitter gel pen, but unfortunately, it doesn't show up in the picture.  The designer card stock that I matted with was also glittered.  I decided to use a dark orange card base to match the butterflies.  I used embossing ink with a small butterfly stamp and just gave the background a little more interest.  All in all, I am really pleased with the way it turned out.  I have learned that there should be no limits to my designs!

Out side of card.

Inside of card


This next card that I made is for an entry into another design team called
Delicious Doodles.  They are the same company from which I chose the image before this card.  We were to use that particular image.  I colored with Copics and used white Stickles for the whipped cream.  I added some small rhinestones to look like sprinkles.  I also added some glitter gel pen highlights and some white pen highlights to the strawberry.  If you click on the image, you can see more of the detail.  I took a piece of teal CS and added some printed tape into three rows.  I then cut it out with Nestabilities.  I added the white stitching to give it some more dimension.  I added the sentiment and distressed with Ranger distress ink and then added the cup cake with pop dots.  The base card was embossed with a Cuttlebug folder.  The inside was stamped and also distressed and the background had stitches added to match the front.  Don't you just love the inside saying?

Friday, August 10, 2012

Friday, August 10, 2012

Here are a couple of card that I have recently made...


This is a card for the week #2 challenge for Created with Love Challenges.  We were to use a digital birthday stamp from Bugaboo Stamps.  I chose this one because I thought it was really funny & cute.  I colored with Copic markers and put lots of Clear Star gel pen which you can not see!  I also used Glossy Accents on her glasses and on the balloon.  It really looks great in person.  I mounted it on purple mulberry paper and added a hot pink ribbon.  The top lace is actually a stamp from Stampin' Up.  It was a roller stamp, but I removed it from the roller and mounted it on E-Z Mount foam.  Now I have more control of the stamp.
Here is the link for CWL Challenges.  


I just felt in the Christmas mood last night.  I was playing with some Ranger alcohol inks and I made the background.  I stamped the peace image, distressed the edges and colored the letters with Copics.  I punched a separate piece of card stock and punched with my Fiscars snowflake border punch.  I lightly distressed it and attached it to the stamped image.  I colored the snowflakes with my Clear Star gel pen. I added brads in the corners.  I had the poinsettia already made from a while back and decided to add it to the top corner.  The flower was made by punching cardstock,3 red and 1 green.  Then, I wet all of the pieces and scrunched them up and then straightened them out.  After they dried I bent the petals.  I also added some Flowersoft for the stamen and some glitter gel to the edges of the petals

Sunday, August 5, 2012

I have been chosen to be on a design team!  Yea.  I am only committed for a month, but at least I have my foot in the door.  It seems that you have to be on a design team to get on a design team!  The name of the company is Created With Love Challenges.  I have a link on the right hand side.  It is a new company, just getting started so it is nice to be there from the beginning.  I have already posted 2 pics on the site.  I will post both of them here, today.  I have been a busy bee this week and have created a lot of cards.  Here they are...


I purchased this old lady stamp from a garage stamp sale.  I couldn't wait to use it.  I colored the lady with Copic markers and cut her out.  I did the saying on the computer because someone who got to the sale before me, already purchased the saying stamps that go with it.  I had some lace and glued it onto the card (no easy task I might add).  I added a slim ribbon on the top so it would look more finished.  The lady appears to be hiding around the curtains.  (Notice her hand holding the curtains).  The inside says "Sag, you're it!"  I sent it to my older sister for her birthday.  Leslie, if you see this before you get the card, I hope you like it!


This is one of the cards I made for my first design team challenge.  The theme is Christmas.  We were suppose to use a digital stamp from a company called Digi Darla.  I colored it with Copics, added glitter gel pen in certain places and added some texture on the snowman.  I also used Glossy Accents on the ornaments and candles.  Then, I tore some mulberry paper and embossed it on my Cuttlebug.  I mounted it on designer paper.


This is another digital stamp that I used, but I am not sure where it was from.  Anyway, I really loved the image and had fun doing all of the coloring (with Copics of course).  I double mounted it and punched the bottom of the card with a Martha Stewart punch.  I added the same blue cs that I used for the mounting.  I also added Glossy Accents to the candle and the fish bowl and the eyes of the cat.  Of course, it looks much better in person, and the cats really look like they are jumping out of the picture!


This card was so simple to make.  I made it for my club's card sketch that I designed.  The bird image is from a tag set that I also got from the same craft sale.  I cut the image and the scalloped frame with my Spellbinders.  There was a notch on the top of the bird (from where the string went for the tag) so I decided to put a button over the notch.  I think I found the perfect button to use.  

Speaking of buttons, a friend from church collects old buttons.  He actually goes to conventions.  He gave me this large tub full of buttons that he didn't want and said to take what I would like and give some to my stamping friends.  We emptied half of the tub!  What fun we had.  He said I should go to a convention with him to see what they do.  I would love that!


This is the other Christmas stamp from Digi Darla that I posted on Created With Love.  The card is a gate fold (it opens in the middle).  I have some beautiful designer cs that I cut out to go on the panels.  I colored the image with Copics and glued one half of it and adhered it to one of the panels so that it is centered.

Hope you enjoy my work.  Remember to leave a comment below so I can find out what you think.
Till Next time...

Monday, July 23, 2012

I know it has been a while since I posted.  This will probably be the last of my Christmas in July.  That doesn't mean that I won't be posting more Christmas cards.  I have been very busy making lots of cards and I want to share them with you.


I made this last night for a client who wanted something for her older son who is into football...The Steelers, of course.


This one is also one that I sold to the same person for her granddaughter's 10th birthday.


This is such a great stamp set.  I used paper piecing on this card.  I stamped the entire image onto white card stock.  Then I stamped the boxers onto designer paper, cut them out and glued them over the original image.  The inside says depends.  Don't you just love it?  It really makes a great card for a man.  I gave it to a friend whose birthday is today.


This card I made for my husband who is away.  I stamped the image and colored it.  I cut it out and mounted it on 2 pieces of laminate samples.  I put the 2 ribbons on the top to cover the holes in the samples.  I used Stazon ink to stamp the brush around the stump.  


This card was made for a friend who I had lunch with today, for her birthday.  Lots of layers.  All of the butterflies were die cut from designer paper.  The green background was dry embossed on Core'dinations card stock and then I sanded it to get the lighter core.  The flowers are punched and then covered with torn, light blue vellum.

Next, I have some Christmas cards to show...These are easy for me to remake for special orders...


Simple but effective.  It is colored and I added gold and glitter pen.  


I really like this Three Wise Men card.  I made it on my Cricut and distressed it to make it look like sand in the background.


This is one of my favorite Santas.  I stamped it on white and colored with Copics.  I then cut it out and mounted on the ho ho ho designer paper.  I have done him a few times with different backgrounds and it always looks great.

Remember, a lot of these cards are for sale or by special order.  If you are interested in a special order (any number of cards), please order early!  I get pretty busy towards December and I may not get the time to do them if it is too late. 

As usual, I ask that you please leave a comment.  I really would like to know what you think of my cards!

Saturday, July 14, 2012

One more Christmas in July and some others...


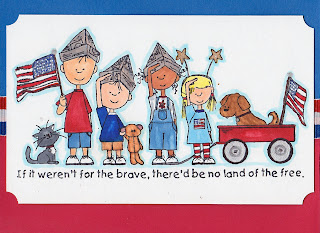
 I went to a July 4th party and I snatched one of the tooth picks with the flag on it.  I thought it would make  great thank you card.  I removed the bottom of the toothpick and glued the little flag onto the red, white and blue ribbon.  The inside says "and it was a grand old party".


I started this card a while back in my stamping club.  I didn't know what it needed to make it pop.  I finally decided that the buttons would do the trick.  They did and I love the way it turned out.  I even made an envelope for it, as the size was different than most square cards.

  
This card was made for a shower card for my pastor's daughter.  I Embossed and punched the flowers and cut out the stamped sentiment with Nestabilities.  I colored white ribbon with Copic markers to have it match the color.  The top flower and sentiment (sorry about the photography) were pop dotted for dimension and the other flower was just glued on.  
  
  
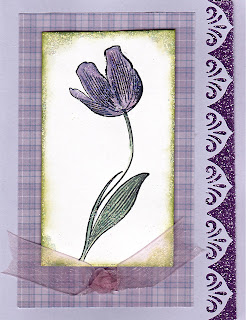
This is another card that I made a while back and didn't finish until yesterday.  The technique is called black magic.  I stamped it with white ink and colored with colored pencils.  When I tried to make the card originally, I cut out the window from the embossed card.  The problem was that it wouldn't stand on it's own because it was too flimsy.  I tried putting vellum under the window, but then you couldn't see the flowers on the inside, unless it was closed.  I found some plastic from packaging and glued that on to the back of the window and presto, it stands up and you can see the whole image!


This is the one holiday card that I worked on this week.  I colored the image with Copic markers and cut with my Nestabilities.  I layered with dark grey and white mats and added the red polkadot ribbon.

I will try to make some more Christmas cards to post next time.  Hope everyone is having a great summer.  Don't forget to leave a comment and tell me what you think!

Tuesday, July 3, 2012

Well, it is now July 3rd and I said I was going to have Christmas in July, so I am starting now.  I am adding 2 new cards that I just made and 1 card that I made a while back.  I hope you enjoy them!

  
 This card is made from designer paper in the corners and mounted on black card stock that was embossed with a lot of Christmas greetings.  I ran the white ink pad over the embossed images to make them stand out.  The Nativity ornament is a digi stamp that I colored and cut out with round nest abilities.  I made the ornament holder with part of a punched scalloped circle, cut it and outlined it with a glitter pen.  I made a slot on the top and added a trimmed piece of ribbon for the hanger and put it on with pop dots.  This is actually made from a card sketch for my club that is due next month.


This is also a digi stamp that I just made today.  I had a good time coloring in the tree and ornaments.  I cut the image out with Nestabilities and mounted it on embossed paper and added the ribbon and made a double bow to make it pop.


This is one that I made last year when I was in my Christmas groove.  I loved using the different designer paper.  The image is another digital that I made to look old by using distress ink.


I hope everyone has a great 4th of July holiday.  I will be staying home for the most part, however, I will be going to a party tomorrow evening.  They are always fun!

Till next time...

Sunday, June 24, 2012


Today is Sunday and it has been pouring the entire day.  I mean it has not stopped for a minute.  My back and side yards are a total lake.  I can't even take pictures because it won't stop raining!  A great day to stay home and watch TV and work on cards.  That is exactly what I did.  


This first card is one that I am thinking of doing for my club's card exchange.  I used a digital stamp and colored it with Copic and Sharpies.  I added Flower Soft to enhance the leaves and give it a 3D look.


This card was made with a stamp that stamps the entire shirt card.  I stamped it on designer paper and added the pearls and embellishments.  The inside says friends make the best accessories.  I am giving it to a friend for her birthday this week. 


These are actually tiles that I made a couple of years ago.  I decided to post them so everyone can see what else I do.  The tiles are tumbled marble and I used napkins for the front.  While the glue was still wet, I rubbed off a little of the sides and corners to give it a distressed look.  When they dried thoroughly, I sprayed them with a fixative.  I liked them so much that they are attached to my mantle in the living room!


I made this card for a friend's birthday 1 or 2 years ago.  She is big time into golf and I thought this digi stamp was perfect for a woman.  

Wednesday, June 20, 2012

Wednesday, June 20


I am posting 2 new cards that I just finished.  Not a lot going on right now.  Choir practice, cards and computer...that's my day!


This card was done with a large stamp that I hadn't used before.  I had a lot of fun coloring it.


This card was made for a card swap for my advanced stamping club.  The theme was oriental.  I stamped the 3 images and punched them out with my 1" square punch.  I also used a punch for the Oriental symbol that means good luck.  I used a piece of gold card stock for underneath the punched symbol.

Saturday, June 16, 2012

 Today is Saturday and I have been in my PJ's all day.  I have been making lots of cards!  I am in the process of trying to get on a design team so I am doing certain types of cards for that.  

I made this card while visiting Sparkle n Sprinkle last Monday.  I was  in Tampa and had tests in the morning.  I suggest to Jack that he go to Bush Gardens.  That gave me the rest of the day to check out the stamping store.  I have purchased their things and seen them at stamping shows, but I have never been to their store.  It is smaller than I expected, but it was full of wonderful things!  I made this Make and Take while I was there.

This card was done for operation Shoebox.  Everyone in my stamping club was given the stamped image and we all had to color it and make a card to send to the men & women overseas.  I used Copic markers and a Sakura clear star gel pen for highlights.  I really like the way it turned out.
I just finished this card.  I used some lace that I purchased at Sparkle n Sprinkle and applied it to sticky paper.  For the background, I sprinkled silver glitter and rubbed it in.  Then, I removed the lace and used red glitter to fill in the design.  I then cut it with the largest Scalloped Nestabilities.  I glued it onto the mat and added three rhinestones in the corner.  Mounted it onto white card stock and added a tulle "bow".  Isn't is gorgeous?
This card is made by heat embossing the solid image with Sparkle n Sprinkle detail black.
Then, I sponged the background with 3 different Ranger distress inks.  I rounded the corners and  mounted it on black card stock.  The whole thing only took me about 20-30 mins.!


That's all for today.  Enjoy your weekend  and God Bless.